Why a Checklist Matters for Elizabeth, NJ Homes
Installing a dryer vent is not just about attaching a tube and calling it a day. A well-planned, well-executed installation protects your dryer, reduces energy waste, and lowers fire risk. For homeowners in Elizabeth, New Jersey—where older homes meet newer renovations and weather swings from humid summers to icy winters—a disciplined checklist keeps you on track. This comprehensive list covers planning, materials, safety, routing, sealing, weatherproofing, and final testing so you can achieve a durable result the first time.
Use this as a step-by-step companion or a pre-inspection form to make sure your work meets practical safety standards. If you prefer expert help, experienced providers of dryer vent installation can follow a similar checklist while tailoring solutions to your specific home and laundry habits.
Pre-Planning and Site Assessment
Confirm where the dryer will sit and where the vent can terminate on an exterior wall. Short, straight routes are best. Check for obstacles such as plumbing, gas lines, wiring, or framing members that would complicate the path. If your laundry space is in a basement, inspect the rim joist and exterior grade. Choose a termination point high enough to clear snow and landscaping, with a clear path for maintenance access.
Evaluate the dryer model and note its maximum allowable vent length. Consider the age of the home. In many Elizabeth houses, framing is not perfectly plumb, so plan for a small alignment adjustment with a smooth elbow rather than twisting ducts out of round.
Materials and Tools You Will Need
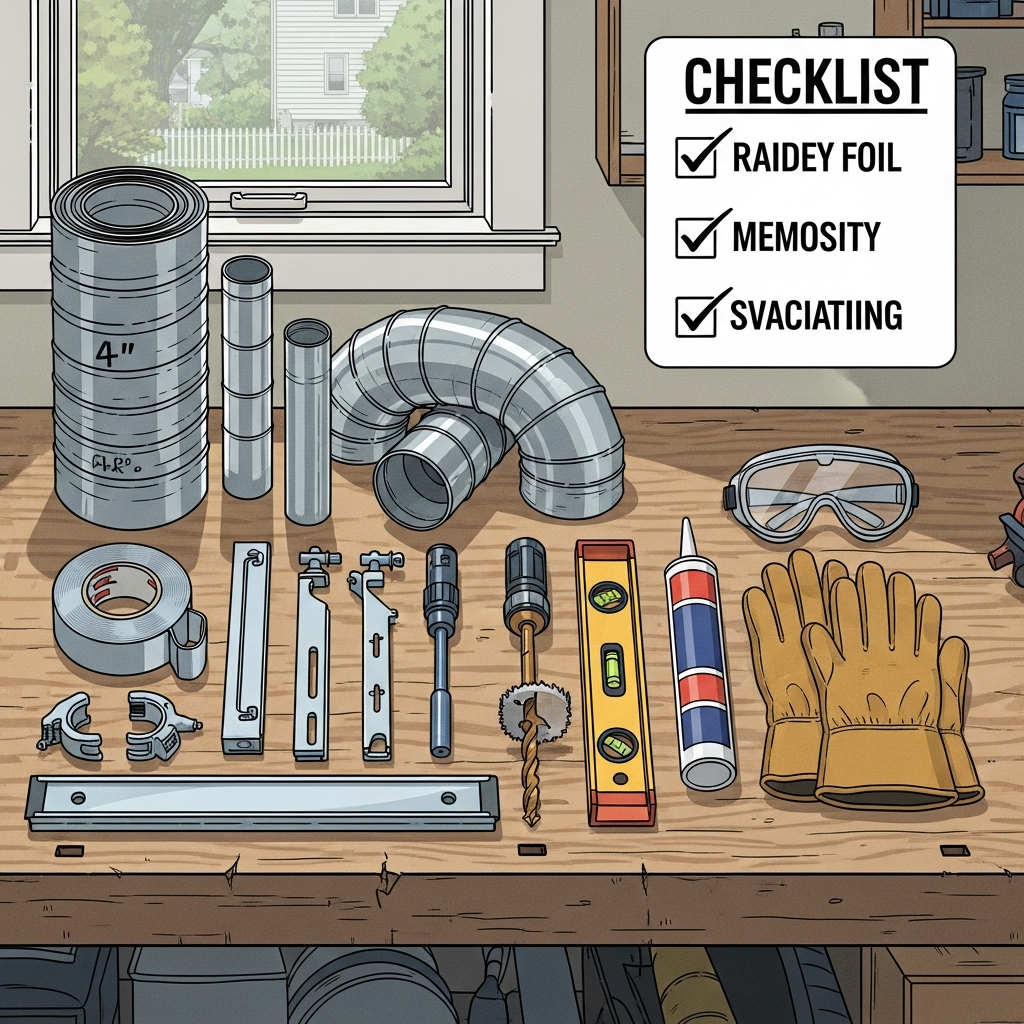
Gather 4-inch rigid metal duct, smooth adjustable elbows with wide radii, a code-appropriate transition connector at the dryer, clamps, high-temperature foil HVAC tape, and a dryer vent hood with a free-swinging damper. For exterior sealing, use a weather-rated caulk suited to your siding or masonry. Have gloves, eye protection, a drill, a hole saw or masonry core bit, tin snips, a level, and a measuring tape ready.
Avoid screws that intrude into the airflow, avoid plastic duct, and avoid unlisted tapes or cloth-backed products. Purpose-built parts produce cleaner airflow and less lint accumulation.
Safety and Code Considerations
Unplug the dryer and shut off gas before starting. Keep combustibles away from the work area. Confirm that your plan vents exhaust outdoors—not into an attic, crawlspace, garage, or soffit. Verify clearance to utilities on the exterior. In New Jersey communities like Elizabeth, you may need to meet local building and mechanical safety standards and follow manufacturer’s instructions for maximum duct length. When in doubt, speak with your local building office.
Keep a fire extinguisher nearby when cutting or drilling. Wear gloves while handling metal and eye protection for power tools. If you will cut masonry, consider hearing protection and a dust mask.
Routing and Layout Checks
Choose the most direct path with the fewest elbows. Each elbow increases resistance and can slow airflow. If you must use elbows, select smooth, long-radius types and count them toward the maximum equivalent length in your dryer manual. Sketch the path and dry fit pieces before you make the wall opening. Confirm you can reach every joint for taping and that there is space to support the duct every few feet.
Mark joists, studs, and obstructions. If you need to shift the dryer a few inches to achieve a straight shot, it is often worth the effort. Short, straight runs are cleaner, safer, and easier to maintain.
Before you commit, step outside and double-check the termination location. Avoid extreme low points where snow can pile up and block the hood. Provide adequate clearance from windows and doors to prevent lint deposition and drafts.
Cutting the Penetration
Drill a pilot hole from the interior to pinpoint your exit. Move outside and confirm the location is clear. Using the correct hole saw or core bit, cut the opening to match your hood or sleeve. Keep the cut clean and level. In brick or block, take your time and vacuum debris. Dry fit the hood to confirm the damper swings freely and sits flush against the exterior surface.
Angle the hood slightly downward as it exits the wall to promote drainage. Verify you can insert the interior duct to meet the hood without forcing joints.
Assembly and Sealing
Reassemble your dry-fitted duct, orienting crimped ends in the direction of airflow toward the exterior. Tape every joint with high-temperature foil HVAC tape, pressing and smoothing the tape so it bonds securely without wrinkles. Avoid screws that protrude into the interior of the duct, as they snag lint. Keep elbows to a minimum and ensure each one has a smooth curve.
Support the duct with straps every few feet. Gentle, consistent support reduces vibration and prevents sagging, which would collect lint. Where the duct passes near storage areas, maintain clearances so boxes and fabrics do not touch the metal.
Transition Connection at the Dryer
Use a short, manufacturer-approved transition connector between the dryer and the rigid duct if alignment requires it. Clamp the connector securely on both ends, then check for kinks or crushing when you move the dryer back into place. Leave enough slack for service access while keeping the path smooth. Keep the connector as short and straight as possible.
Ensure the dryer’s exhaust collar is clean and free of lint before connecting. A clean start reduces the chance of an early buildup near the appliance.
Exterior Weatherproofing
Set the hood and fasten it firmly. Apply exterior-grade sealant around the flange to block wind-driven rain and pests. Smooth the bead so water sheds away from the siding or brick. Confirm the damper still operates freely after sealing, and that no caulk interferes with its swing. In Elizabeth’s winter winds, a well-sealed hood also prevents drafts into the laundry room.
If your exterior is uneven masonry, take extra time to work sealant into voids. The better the seal, the less chance of leaks or pest intrusion.
Performance Checks Before You Finish
Plug in the dryer and, for gas units, reopen the shutoff according to manufacturer guidance. Run an air-fluff cycle and confirm strong airflow at the hood. The damper should open widely and move without sticking. Listen along the duct path for rattles that indicate loose supports or misaligned elbows. Adjust hangers or tape as needed.
Run a heated cycle with a small load and time the results. Efficient venting shortens cycle times. If your times are still long, recheck for a compressed transition, excess elbows, or a hood that is too restrictive.
Final Housekeeping and Documentation
Label the duct run near any access points so future homeowners or technicians can identify it quickly. Photograph the route before you close any access panels; the images help during future maintenance or remodeling. Store extra foil tape, a small piece of rigid duct, and spare clamps together so repairs are straightforward if someone bumps the system later.
Note the date of installation and set reminders to inspect the vent periodically. Consistent follow-up keeps performance high and reduces hazards.
Common Pitfalls to Avoid
Do not vent into indoor spaces. Do not use plastic or full-length foil flex for permanent runs. Do not leave joints untaped or rely on cloth-backed duct tape. Avoid small-radius elbows that crimp the airflow. Do not mount the hood so low that snow or mulch can bury it. Each of these missteps increases lint accumulation and reduces safety.
Another frequent oversight is failing to provide adequate access. If you cannot reach a joint to re-tape it in the future, reconsider the route now while it is easy to change.
Maintenance Starts on Day One
Empty the lint screen before every cycle, wipe the screen with a damp cloth monthly to remove fabric softener film, and look at the exterior hood periodically to ensure the damper is moving and free of lint. Plan an annual cleaning for the rigid duct, especially if you do heavy laundry or live with pets. Keeping the vent clear protects bearings, heating elements, and safety switches inside your dryer.
After storms, check that wind-driven rain has not carried debris into the hood. Trim vegetation that starts to crowd the termination.
Mid-Project Decision Point
If the route becomes complicated or your equivalent length exceeds what the dryer allows, pause and reconsider. Sometimes shifting the dryer a few inches or moving the exit point saves multiple elbows and future headaches. When circumstances demand advanced tools or specialized terminations, bringing in local experts in dryer vent installation can be the most time- and safety-conscious choice.
Pros can also test airflow quantitatively, confirm that backdraft dampers operate correctly, and suggest improvements you might not know are possible in your specific home layout.
Frequently Asked Questions
Q: How long can a dryer vent be? A: The answer depends on your dryer’s manual and the number of elbows. Each elbow adds an equivalent length penalty. Keep the route as short and straight as possible and verify you remain within the manufacturer’s limit.
Q: What type of duct is best? A: Use 4-inch rigid metal duct for permanent runs. Keep a short transition connector at the appliance if needed. Rigid metal is smooth, low-resistance, and safer over time.
Q: Do I need a screen at the exterior? A: Choose a hood designed for dryer exhaust with a damper. Very fine screens can clog with lint and are not recommended. Use terminations that balance pest control with airflow.
Q: Can I share the dryer vent with a bathroom fan? A: No. Dryer exhaust must have a dedicated duct and termination to prevent lint and moisture problems.
Q: Is foil tape really that important? A: Yes. Proper foil tape seals joints, prevents leaks, and keeps moisture out of wall cavities. It is a simple step that makes a big difference.
Q: What are warning signs of a problem? A: Longer dry times, hot laundry rooms, musty odors, or a damper that barely opens suggest restricted airflow. Investigate immediately to prevent damage.
Take the Next Step for a Safer Laundry Room
With a clear checklist and a careful approach, you can complete a durable, code-conscious installation that keeps your Elizabeth, NJ home safer and your laundry routine faster. If you want guaranteed alignment, sealed joints, and quantified airflow without the trial and error, schedule professional dryer vent installation and enjoy peace of mind from the first load onward.
