A disciplined inspection is the backbone of any effective air duct cleaning plan, especially in Elizabeth, New Jersey, where homes range from historic structures to newer builds and experience both humid summers and cold winters. This checklist gives you a clear, step-by-step sequence to evaluate duct conditions, airflow, cleanliness, and risk factors before you commit to a DIY clean or call a professional. To compare your findings with a full-service approach, you can also review reputable air duct cleaning services and use this guide to verify that each critical point is addressed.
Inspection does more than decide whether dust is present. It helps pinpoint why dust accumulates, whether moisture or temperature patterns are encouraging odors, and if leaks are drawing contaminants from basements or attics. The more systematic your inspection, the more targeted and efficient your cleaning and repairs will be. The steps below emphasize safety, documentation, and practical tools you can use without specialized training.
Prepare for a Safe and Effective Inspection
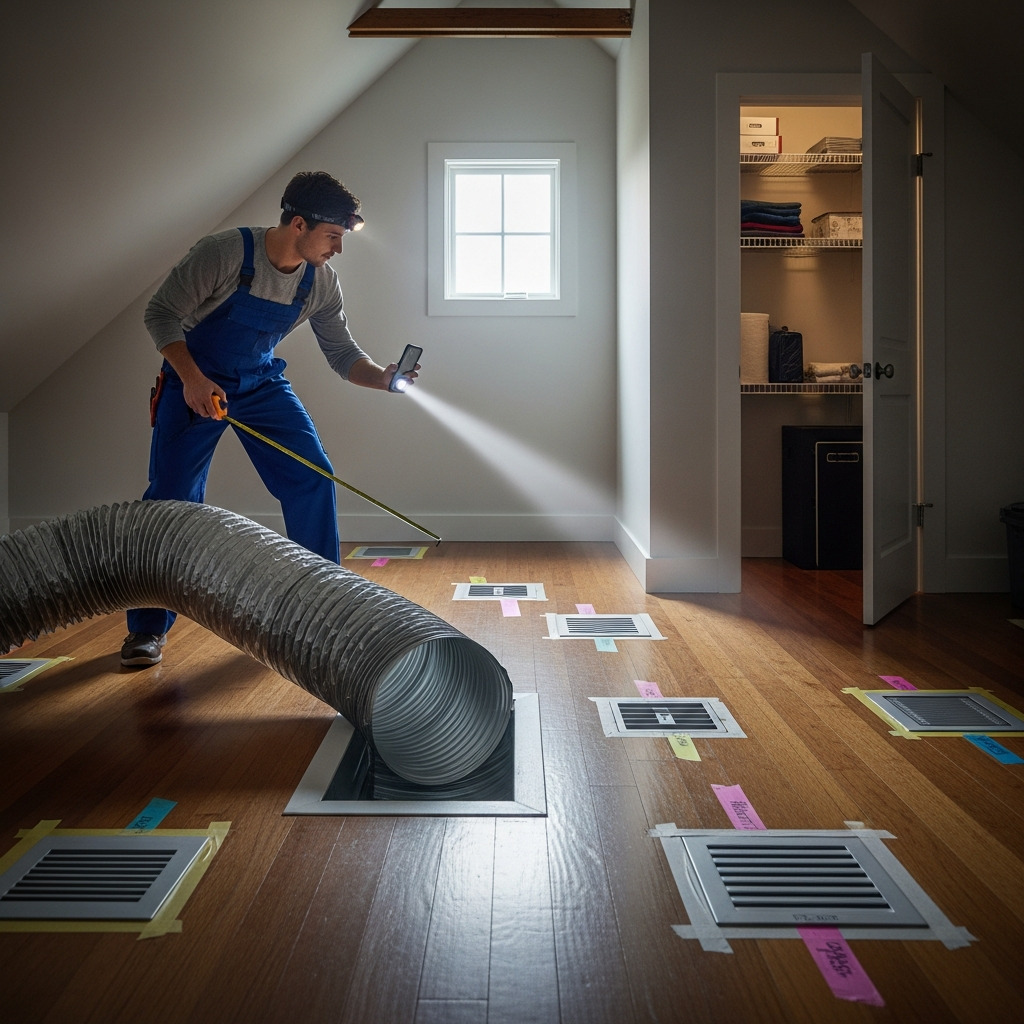
Before you begin, turn the thermostat to “off.” If you plan to remove access panels, cut power at the breaker. Wear a dust mask or respirator, safety glasses, and gloves. Gather a bright flashlight, tape measure, screwdriver set, camera or smartphone, sticky notes or tape for labeling vents, and a notepad for observations. Keep painter’s tape handy for temporary sealing of vents you have tested or documented.
Set clear goals: determine the general cleanliness of supply and return ducts, identify obstructions, look for moisture sources, verify filter fit and condition, and gauge airflow from key registers. This clarity ensures that your inspection translates directly into an action plan.
Map Your System and Label Vents
Create a simple drawing of your home’s layout. Mark returns (usually larger grilles and fewer in number) and supplies (more numerous and smaller). Note any rooms that feel hotter, colder, or dustier—these are priority points for airflow checks. Label each grille with a small piece of tape on the frame so you can track progress and compare photos later.
Elizabeth’s housing stock includes many basements with air handlers and mixed duct materials. Your map should indicate flexible runs, metal trunks, and any known damp areas. This detail helps you anticipate which sections may collect more dust or face condensation risks.
Check Filter Fit, Type, and Condition
Remove the current filter and document its size, MERV rating, and date of last change if marked. Look for gaps around the frame; a filter that is too small or warped lets unfiltered air bypass, loading ducts with dust. Photograph the filter face and note color or debris patterns—heavy accumulation on one edge may indicate leakage or misalignment in the filter rack.
If the filter is collapsed, sticky, or wet, investigate humidity and condensation sources. A saturated filter signals underlying problems that an inspection must uncover before cleaning proceeds.
Visual Inspection of Returns
Remove return grilles carefully. Shine a flashlight into the duct and take photos from different angles. Look for loose lint, gray dust mats, and any foreign objects. Pay attention to the first few feet where debris usually collects. If you see signs of mold growth—dark or fuzzy patches—or evidence of vermin, do not proceed with DIY cleaning; professional assessment is appropriate.
Note construction quality: seams with aged cloth tape, visible gaps, or crushed flex duct. These defects may be pulling dusty air from adjacent spaces. Mark their location on your map and include a close-up photo for future reference.
Visual Inspection of Supplies
Remove a selection of supply grilles across different rooms and floors. Use your flashlight and camera to gauge dust on the duct walls and at elbows or branch connections. Compare “clean” rooms to those that seem dusty or have temperature swings. Differences can reveal blockages, long runs with reduced velocity, or hidden leaks.
Check the back of each grille and the vent collar for sticky films from cooking or aerosols. A thin film traps dust faster and may benefit from gentle cleaning of nearby surfaces along with the duct opening.
Airflow Checks: Simple but Revealing
With grilles reinstalled, power the fan to “on” at the thermostat (heat or cool off). Hold a lightweight tissue near several supplies and returns. Observe the pull or push and compare rooms. Weak flow in one room relative to others could reflect a partial obstruction, a long or kinked flex run, a closed or stuck damper, or a disconnected branch. Record these results on your map with arrows or short notes.
Listen while the fan runs. Whistling suggests narrowed passages or poorly seated grilles. Rattles may indicate loose covers or panels. Consistent sounds at a specific vent guide you to inspect that location more closely during cleaning.
Moisture and Temperature Red Flags
Use your senses and a simple hygrometer if available. Musty smells near certain returns point to damp basements or crawlspaces. Water staining on nearby framing or insulation suggests condensation or leaks. Feel duct surfaces in unconditioned spaces; noticeably cool sections during humid days can condense moisture, encouraging dust adhesion and microbial issues.
Document each red flag with a photo and a brief note describing conditions, weather, and whether the odor increases when the system runs. These details help a professional diagnose root causes if you seek assistance later.
Blower Compartment and Accessible Components
With power off, remove the blower compartment panel if you are comfortable. Inspect for dust accumulations on flat surfaces and around the housing. Look for signs of debris migrating past the filter slot. Photograph the area before touching anything. If you see oily residues or rust, note them—these may indicate motor, drain, or moisture issues beyond routine cleaning.
Peek into the evaporator coil housing if accessible. Visible matted dust or bent fins call for professional care. If only light dust is present on accessible non-fin surfaces, you can plan a gentle vacuum during cleaning.
Duct Integrity: Leaks, Joints, and Insulation
In basements or attics, examine trunk lines and branch takeoffs. Look for gaps, dried or peeling tape, and crushed sections. Feel for air movement at seams when the fan runs. Lightly mark problem areas with painter’s tape. Insulation that is thin, wet, or missing is a cue for later upgrades to prevent condensation and dust adherence.
Take photos of any disconnections or severe damage. Cleaning without repair can redistribute dust or waste your effort by letting contaminants re-enter from surrounding spaces.
Prioritize and Plan Your Cleaning
Based on your notes, rank tasks: quick DIY cleaning of readily accessible return and supply openings, sealing minor reachable leaks with UL-rated foil tape, replacing the filter, and scheduling professional work for inaccessible or risky areas. A prioritized plan ensures you address the causes of dust accumulation, not just the symptoms.
Set aside time and assemble tools in advance. Label cleaning stages on your map and prepare fresh filters. If your inspection shows heavier dust loads in returns than supplies, start with returns. If you flagged moisture, coordinate dehumidification before or during cleaning.
Documentation: Photos, Labels, and Checklists
Consistency turns a one-time inspection into a maintenance asset. File photos by room and vent label. Note filter sizes and MERV ratings. Keep a simple checklist for each season that records humidity readings, airflow impressions, and any odors. When you track these details over time, patterns emerge that guide better decisions.
Documentation also provides value if you hire help. Sharing clear notes and photos speeds diagnosis and demonstrates your expectations for thoroughness. Many homeowners feel more confident comparing providers when they can reference a detailed, room-by-room snapshot of duct conditions.
When a Professional Inspection Adds Value
While a homeowner’s inspection covers most basics, specialized tests can reveal hidden issues—duct pressurization to measure leakage, camera scoping of long runs, and microbial sampling when contamination is suspected. If your DIY inspection uncovers mold-like growth, persistent odors, disconnected branches, or severe dust mats, enlist professional assistance without delay to prevent spreading contaminants.
Professionals also help you balance airflow among rooms, identify restrictive filters or grilles, and recommend improvements that fit Elizabeth’s climate. If you are considering a full service with negative-pressure equipment and comprehensive documentation, review options that provide end-to-end air duct cleaning so your cleaning plan and inspection notes align.
Frequently Asked Questions
Q: How often should I perform a home air duct inspection? A: Conduct a focused walk-through at least annually, with a quick mid-season check during heavy heating or cooling use.
Q: What should I do if I find evidence of moisture? A: Identify and address the source—dehumidify, repair leaks, and improve insulation where ducts pass through unconditioned spaces—before proceeding with cleaning.
Q: Are phone photos good enough for documentation? A: Yes. Take multiple angles with and without flash, include a label in the frame, and store images in a folder by room for easy comparisons later.
Q: Can I rely on visual checks alone? A: Visual checks are a strong start, but airflow testing, filter inspection, and listening for noises add important context. Combine all four for a complete picture.
Q: When is it unsafe to continue DIY work? A: Stop if you suspect mold, vermin, or structural damage to ducts. These conditions call for containment, specialized tools, and trained technicians.
Q: What about odor that only appears when the AC runs? A: Investigate the evaporator coil, drain pan, and insulation near cold ducts. Condensation or microbial growth in these areas commonly causes AC-related odors.
Turn Your Findings into Cleaner Air
A structured inspection empowers you to act confidently—sealing small leaks, changing filters on schedule, and planning cleaning where it matters most. As you refine your checklist and gather photos year after year, you will see measurable improvements in comfort and cleanliness. When you are ready to pair diligent inspection with a comprehensive service, connect with local experts who offer thorough air duct cleaning so your home benefits from both careful oversight and detailed execution.
