Protect Your New Installation with Smart, Simple Maintenance
Finishing a new dryer vent installation is a big step toward safer, faster laundry days. To keep that performance over the long haul—especially in a place with Elizabeth, New Jersey’s changing seasons—you need a practical maintenance routine. The habits outlined here help prevent lint buildup, keep moisture out of wall cavities, and preserve efficient airflow. You will learn how often to clean, what warning signs to watch for, and how to adapt your routine to local weather and your family’s laundry volume.
This guide assumes you already have a proper setup with a short, mostly straight run of rigid metal duct, sealed joints, and a quality exterior hood. If you inherited a system and are unsure how it was installed, you can still apply these tips while planning upgrades when convenient. And if you decide you would rather have a trained team verify everything, seasoned pros who focus on dryer vent installation can evaluate your system and suggest improvements and maintenance intervals tailored to your home.
Daily and Weekly Habits That Pay Off
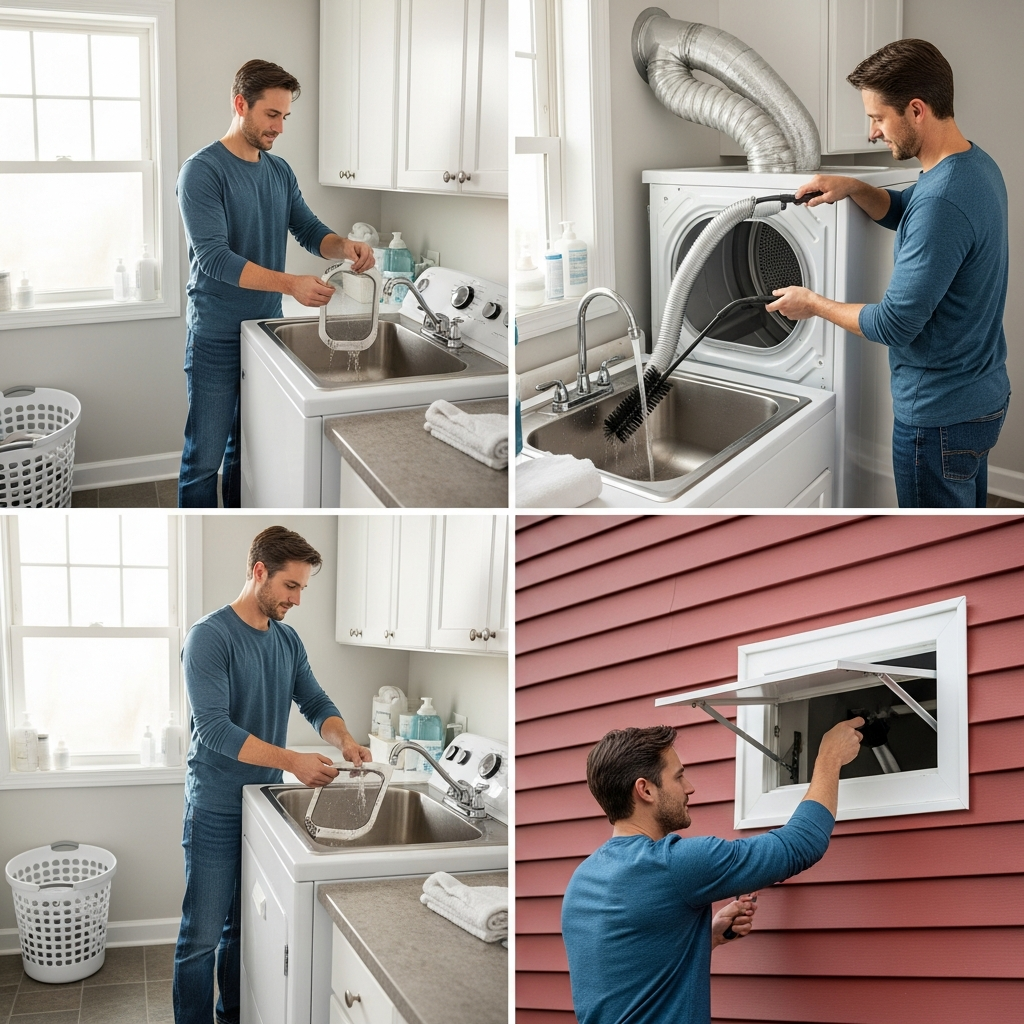
Empty the lint screen before every cycle. A full screen reduces airflow at the source and encourages lint to migrate into the duct. Once a week, inspect the screen for a waxy film left by dryer sheets or fabric softener. If you see it, wash the screen with warm water and a tiny bit of mild soap, rinse thoroughly, and let it dry before reinserting. A clean screen keeps fine fibers from riding the airflow and accumulating downstream.
Pay attention to cycle time. If a regular load suddenly takes 15–20 minutes longer, treat it as a maintenance alert. Before blaming the appliance, check the transition connector behind the dryer for kinks and confirm that the exterior damper opens fully during operation.
Monthly Checks of Airflow and the Exterior Hood
Once a month, run the dryer on air-fluff and step outside to watch the hood. The damper should open widely and move freely without sticking. If it barely opens, investigate: lint may be accumulating near the termination, the damper hinge could need cleaning, or the duct may be partially obstructed further upstream. Wipe away visible lint at the hood and confirm there is no vegetation crowding the opening.
Inside, pull the dryer forward carefully and look for crushed or twisted sections at the transition connector. Check the first accessible section of rigid duct with a flashlight. If you see lint clumps, note that you may need more frequent cleaning or an adjustment to an elbow that has too tight a radius.
Quarterly Interior Inspection
Every three months, inspect the accessible ductwork for loose tape seams, sagging supports, or any sign of discoloration that might indicate heat or moisture. Press a finger along taped joints to confirm they remain firmly adhered. If tape has lifted, remove old adhesive carefully, clean the surface, and apply new high-temperature foil HVAC tape. Keeping joints airtight preserves airflow and prevents moist air from escaping into framing cavities.
Check the laundry room itself. If the room feels unusually humid or smells musty, there may be a leak or partial blockage. Address small issues early; a short reseal or support adjustment is easier than repairing water-stained drywall later.
Seasonal Tasks for Elizabeth’s Climate
Elizabeth’s winters can be windy and cold, while summers bring humidity and storms. In late fall, inspect the exterior hood and surrounding siding or masonry for cracks or gaps. Reapply exterior-grade sealant where needed to keep wind-driven rain out. Confirm the hood’s damper swings freely after any sealing work. In winter, clear snow that piles near low terminations so the damper does not freeze shut. If ice forms at the hood, verify that warm, moist air is not leaking at interior joints and condensing near the exit.
In spring, trim any plants creeping toward the hood and check for bird activity. Some hoods have removable guards; clean them so they do not become lint traps. In summer, heat and humidity can raise drying times by a few minutes; distinguish between seasonal shifts and the more significant slowdowns caused by obstructions.
Annual Deep Cleaning
At least once a year, perform a thorough cleaning of the vent path. Unplug the dryer and shut off gas if applicable. Remove the transition connector and vacuum inside the dryer’s exhaust collar. Use a vent brush or a vacuum with a long, flexible attachment to reach into the first sections of the rigid duct. Work methodically from the appliance toward the exterior, dislodging and removing lint.
At the outside hood, clean the termination area and damper. If your hood includes a removable guard, take it off and wash it. Confirm the damper seats flat when the dryer stops, and that it opens fully under airflow. Reassemble and retest.
Signs You Need to Act Immediately
Some symptoms require prompt attention: a burning smell, unusually hot clothes at the end of a cycle, the dryer shutting off early or tripping a thermal fuse, or a damper that refuses to open. Do not keep running the dryer in these conditions. Investigate immediately. In many cases, a partial blockage near an elbow or a crushed connector behind the dryer is the culprit; in others, a stuck damper prevents exhaust from escaping.
If you cannot identify the cause quickly, stop using the dryer until the duct is inspected. Safety first, especially in homes with children, seniors, or those with limited mobility.
How Laundry Habits Influence Maintenance
Your maintenance schedule should reflect your laundry volume and fabric types. Households that wash towels, fleece, or pet bedding several times a week produce more lint and need more frequent checks. Households that line-dry some items or run smaller loads may safely extend intervals between cleanings, but should still complete annual deep cleaning to be safe.
Use the dryer’s settings wisely. Overloading restricts airflow and forces lint to settle in the duct. Underloading increases tumbling but can also drive more small fibers into the airstream. Aim for balanced loads and moderate heat when the fabric allows it.
Preserving Seals and Supports
Over time, vibration and temperature changes can loosen supports and lift tape on joints. Whenever you clean, squeeze each hanger gently to verify it still cradles the duct without crushing it. Replace any sharp metal edges or worn straps that could cut into the duct. Re-tape joints as needed. Good mechanical support is a quiet guardian of airflow; you rarely notice it until something goes wrong.
Make sure boxes, detergent jugs, or folded linens do not rest against the duct. Give the vent path the same clearances you would give a warm water pipe. Simple housekeeping prevents hot spots and abrasion.
Moisture Management
Dryer exhaust carries moisture. If joints leak, that moisture can condense in walls, leading to mold or decay. After heavy laundry days, run a quick check: is the laundry room unusually humid? Do you see condensation on cold surfaces? If so, review your seals and verify the damper fully closes when the dryer stops. A damper stuck open can invite humid summer air back into the duct and room.
In basements common to many Elizabeth homes, humidity control also matters. Consider running a dehumidifier during peak summer months to keep the space dry and to help the dryer operate efficiently.
Upgrades That Reduce Maintenance
If you find yourself cleaning more often than expected, consider design improvements. Replacing a tight elbow with a long-radius version can dramatically reduce lint accumulation. Shortening the overall run by relocating the dryer a few inches or moving the termination point can also help. Upgrading to a high-quality exterior hood with a balanced, free-swinging damper often yields a surprising performance bump.
Professional airflow testing can identify bottlenecks invisible to the eye. If your time is limited, bringing in a local team focused on dryer vent installation and maintenance can validate your system and recommend targeted upgrades with measurable benefits.
Document Your Maintenance
Keep a simple log: date, tasks completed, observations, and any changes in dry time. A few lines after each cleaning session help you spot trends. If you sell your home, this record also reassures the next owner that the venting system was cared for properly.
Photograph key areas—behind the dryer, the first elbow, and the exterior hood—after deep cleaning. On your next inspection, compare images to see whether lint accumulates faster in any location. That area may need a smoother fitting or a small reroute.
Frequently Asked Questions
Q: How often should I clean the vent? A: Plan on a thorough cleaning at least once a year, and more often if you run heavy loads weekly or have pets. Watch for cue signs like longer dry times or a damper that barely opens.
Q: What cleaning tools are safe? A: Use a vent brush, vacuum with a long attachment, and soft cloths. Avoid harsh chemicals or adhesives inside the duct. If you disassemble sections, re-tape joints with high-temperature foil HVAC tape only.
Q: Is it normal for some lint to appear at the exterior hood? A: A small amount is expected, but visible clumps indicate a restriction. Clean the hood and check upstream elbows for accumulations.
Q: Can I paint the exterior hood? A: If the manufacturer allows, you can paint the exterior surface to match siding, but avoid painting the damper or any moving parts. Paint can cause sticking that restricts airflow.
Q: What if birds or pests target the hood? A: Use a termination designed for dryer exhaust that balances pest control with airflow and has a removable guard for cleaning. Inspect more frequently during nesting seasons.
Q: My laundry room feels humid; what should I check? A: Confirm the damper closes when the dryer is off, verify all interior joints are taped, and look for gaps around the hood’s flange that need exterior sealant.
Keep Your System Performing at Its Best
With a few routine checks and an annual deep clean, your new installation will deliver the fast, safe drying you expected when you set it up. If you want hands-free confidence backed by expert testing and documentation, schedule professional dryer vent installation maintenance support and enjoy reliable results through every Elizabeth, NJ season.
