Start Here: A Beginner-Friendly Overview for Elizabeth, NJ Homeowners
If you are new to home projects and want to install a dryer vent in Elizabeth, New Jersey, you are in the right place. This guide explains what to buy, how to plan your route, how to assemble and seal the duct, and how to test the finished system. It is written for beginners who may never have handled metal ducting before, with a clear focus on local considerations such as New Jersey’s weather, masonry exteriors common to many Elizabeth neighborhoods, and sensible safety habits you can apply immediately.
Installing a vent the right way protects your dryer, shortens drying times, reduces energy waste, and—most important—minimizes the chance of lint buildup and overheating. Good design and careful execution are what make the difference. From picking rigid metal duct to choosing a proper exterior hood and learning to seal joints with foil tape, every step matters. If at any point you feel uncertain, you can always seek qualified help through a reputable provider of dryer vent installation who understands the needs of Elizabeth homes and local code expectations.
While this tutorial is comprehensive, remember that building and fire safety are your top priorities. Take your time, read through the sequence before you begin, and prepare your space so you can work deliberately and safely.
Understand Your Dryer and the Best Vent Path
Start by confirming the location of your dryer’s exhaust port and the nearest feasible termination point on an exterior wall. Short, straight runs of rigid metal duct are ideal. Each elbow adds resistance that slows exhaust air and captures lint, so aim to keep elbows to a minimum. In a typical Elizabeth basement or first-floor laundry room, the best exit may be a rim-joist penetration to a sidewall or a short vertical rise with an immediate turn out through the band board.
Sketch your room, label the dryer location, and mark studs or joists. If your only path requires more than two or three elbows, reevaluate. A better route—or moving the dryer slightly—can simplify everything for a beginner.
Choose Materials That Protect Your Investment
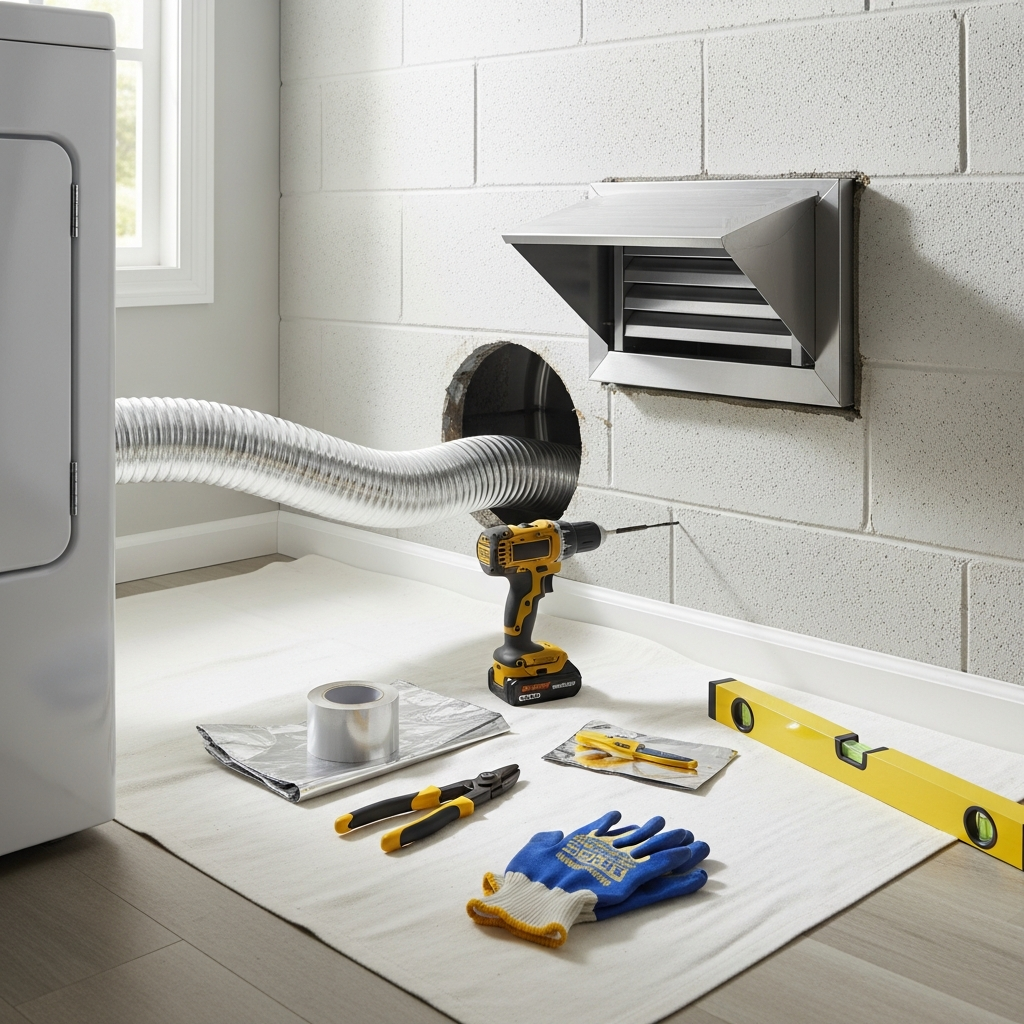
Use 4-inch diameter rigid metal duct (galvanized or aluminum). Avoid plastic or thin foil accordion flex for long runs; it traps lint and is not the best practice for a safe, durable system. You will also need foil HVAC tape rated for high temperatures, a quality exterior hood with a damper, a wall sleeve or thimble if applicable, a caulk or sealant suitable for exterior use, and clamps for the transition connector at the dryer. For masonry exteriors common in Elizabeth, plan on a masonry bit and sealant that bonds to brick or block.
Gather safety gear: gloves to protect hands from sharp metal edges, eye protection for drilling and cutting, and a dust mask if you will cut through plaster, brick, or old siding. A cordless drill, hole saw or masonry core bit (sized to your hood or sleeve), tin snips, a level, and a measuring tape round out the basic tool list.
Plan the Route: Measure Twice, Cut Once
With your sketch in hand, measure the total run, including every elbow. Manufacturers often specify a maximum equivalent length, where each elbow equals several feet of straight duct. The shorter the run, the better. Mark your wall where the vent will exit, making sure the hood will terminate at least a foot above grade, away from decks or walkways where lint might accumulate, and with adequate clearance from gas meters or other utilities. In Elizabeth’s winters, snow can pile against low terminations, so consider a slightly higher location when feasible.
Check for obstructions inside the wall or rim joist. Use a stud finder and drill a small pilot hole from inside to confirm your target location before committing to a large opening.
Step 1: Prepare the Laundry Area
Unplug the dryer and shut off gas if you have a gas appliance. Pull the unit away from the wall to access the exhaust port. Clean behind and beneath the dryer, removing lint and debris that may have accumulated. Clear the floor to create safe working space. Position drop cloths if you will drill through drywall or masonry to control dust and debris.
Confirm that the dryer’s exhaust port is a standard 4-inch outlet. If your appliance includes a removable transition collar, install it per the manufacturer’s instructions. Keep the dryer temporarily disconnected until your duct run is complete.
Step 2: Dry Fit Your Duct Components
Lay out elbows, straight sections, and a short flexible transition connector if needed right at the appliance end. For beginners, assembling most of the run as rigid sections and leaving a single, code-appropriate transition at the final connection makes alignment easier and maintenance safer. Always orient the crimped ends of rigid pipe in the direction of airflow (toward the exterior) so lint cannot catch on an internal lip.
Dry fit the pieces from the dryer toward the exterior, adjusting angles to minimize elbows. Mark joint locations with a marker so reassembly is quick after you cut the wall opening.
Step 3: Cut the Exterior Opening
From inside, drill a pilot hole through the center of the intended exit point. Move outside and verify the pilot hole lands where you expect—clear of trim, utilities, and obstructions. Using an appropriate hole saw or masonry core bit sized for your hood or wall sleeve, cut the opening. In wood siding or vinyl, protect the cut edge with a sleeve or cap designed by the hood’s manufacturer. In brick or block, work patiently, and vacuum dust frequently.
Test fit the hood and confirm the built-in damper swings freely. The hood should slope slightly downward as it exits the wall to shed water. If the hood includes a bird screen, verify that it is removable for periodic lint cleaning.
Step 4: Assemble and Seal the Duct
Reassemble the rigid duct inside, using your marks to align joints. Secure each joint with foil HVAC tape rated for high temperatures. Avoid screws that penetrate the duct interior; even short screws can snag lint. Where an elbow meets a straight section, press tape firmly along the seam and smooth it to eliminate air gaps. Sealed joints improve airflow and reduce moisture migration into surrounding cavities.
As you approach the wall exit, confirm that the interior duct aligns squarely with the hood’s inlet. In some Elizabeth basements with older framing, walls are not perfectly plumb. Add a short adjustable elbow to correct alignment instead of forcing sections to twist out of round, which leads to leaks.
Step 5: Support and Label the Run
Support the duct every few feet with metal hangers or straps to keep it from sagging. Strap the duct to framing members with room for thermal movement and maintenance access. Gentle support prevents vibration that can loosen tape seams over time. If your run passes through a closet or utility area, consider labeling it “Dryer Exhaust” with a marker to reduce confusion for future work.
Where the duct passes near stored items, maintain clearances so boxes or fabrics do not lean against warm metal. Good housekeeping is part of a safe system.
Step 6: Connect to the Dryer and Test
Attach the transition connector to the dryer’s exhaust collar and to the rigid duct using appropriate clamps. Tighten clamps snugly but avoid deforming the tube. Plug the dryer back in and, if gas, reopen the shutoff and test for gas leaks using a manufacturer-recommended method. Run the dryer on a no-heat or air-fluff setting first to verify strong airflow at the hood. The damper should open fully, and you should feel a consistent stream of warm air during a heated cycle.
Inside, listen for rattles indicating loose hangers or misaligned elbows. If airflow seems weak, recheck for kinks or a crushed section behind the dryer. Correct issues before proceeding.
Step 7: Weatherproof the Exterior Termination
Apply exterior-grade sealant around the hood’s flange to keep out wind-driven rain common along New Jersey’s coast-influenced weather patterns. Smooth the bead to ensure water sheds away from the siding or brick. Confirm all mounting screws are snug and sealed. In older Elizabeth homes with irregular masonry joints, take extra time to achieve a continuous seal to prevent drafts or pests.
Recheck the hood damper after caulking to verify it still swings freely and does not stick to fresh sealant. A stuck damper restricts airflow and contributes to lint accumulation.
Common Beginner Mistakes to Avoid
Beginners often underestimate how much resistance elbows add, choose flexible foil duct for the entire run, or drive sheet-metal screws into the airflow path. They may also forget to seal seams with proper foil tape, skip supports, or place the termination too low where snow can pile against it. Another common issue is using interior duct sealants not rated for high temperatures. Stick to purpose-built materials and keep the interior of the duct free from obstructions.
Finally, do not vent into an attic, crawlspace, garage, or soffit. Dryer exhaust must discharge outdoors to remove moisture and lint safely. Venting indoors is a moisture and fire hazard and can promote mold growth—especially problematic in humid summers.
Elizabeth, NJ Considerations: Codes, Weather, and Homes
Elizabeth’s housing stock ranges from older brick row houses to post-war single-family homes and modern renovations. Wall assemblies vary, so the tools you need for the penetration can change significantly. In many cases, you will drill through a rim joist and a masonry veneer; in others, you will pass through siding and sheathing. Make a small exploratory hole first to identify layers before selecting a hole saw or core bit.
New Jersey follows established building and mechanical safety standards. Consult your municipality if you are uncertain about permit requirements, maximum duct length, termination locations, or whether a fire damper or labeled duct is required in your specific situation. When in doubt, a quick conversation with a local building official can save you time and ensure compliance.
Safety Tips Every Beginner Should Practice
Handle sheet metal carefully; edges are sharp. Wear gloves while cutting and fitting, and remove them only for fine adjustments where tactile control is necessary. Keep a tidy workspace so offcuts and metal shards cannot cause slips or punctures. Never operate power tools without eye protection. If you are cutting masonry, consider hearing protection too.
Keep combustibles away from the dryer. Keep the lint screen clean and never run the dryer while asleep or away from home. A properly installed and maintained vent lowers risk, but attention to daily habits matters.
Performance Testing You Can Do
After installation, measure airflow qualitatively by observing the exterior damper and feeling for strong exhaust. You can also tape a lightweight strip of tissue near the hood and confirm it flutters strongly when the dryer runs. Inside, monitor cycle times. If loads used to take 60 minutes and now dry in 35–45, your vent is doing its job. If times remain long, recheck for hidden kinks, an elbow with a too-tight radius, or an undersized hood.
Consider a follow-up check after your first month of use. Remove the transition connector and look inside the first foot of duct. If you see clumps of lint, something upstream is rough or misaligned and may need reassembly for a smoother path.
When to Call for Backup
Even handy beginners can hit obstacles: an immovable joist, a brick wall that resists your core bit, or an unexpectedly long path that pushes the limits of acceptable duct length. Multi-family buildings and mixed-use properties can involve additional fire and mechanical rules. In those situations, or anytime you prefer a fast, professional outcome, consider bringing in a specialist experienced with dryer vent installation who can evaluate your home, provide options, and complete the work with proper tools and materials.
Professional installers can also assess existing vents for hidden elbows behind finishes, evaluate moisture staining around previous penetrations, and recommend terminations that block pests without impeding airflow. Their testing equipment can quantify performance so you know your system is as efficient and safe as possible.
After You Finish: Maintenance Mindset
Mark a reminder to clean your lint screen before every cycle and to inspect the vent path every few months. Elizabeth’s seasons swing from humid summers to chilly winters; both place different demands on your dryer. In winter, look for frost or condensation around the hood, which may indicate a stuck damper. In summer, confirm the damper still swings open fully and that no vegetation has grown into the termination area.
Schedule a thorough vent cleaning annually, or sooner if you launder heavy lint producers such as towels, fleece, or pet bedding frequently. A clear vent protects the investment you just made and maintains fast dry times.
Frequently Asked Questions
Q: Can I run the vent upward through the roof instead of a sidewall? A: Sidewall terminations are usually preferred because they are easier to access for maintenance and often shorter. Roof routes can work but require careful sealing, a roof cap designed for dryer exhaust, and extra attention to elbows and length. For beginners, a sidewall exit is the simplest, safest choice when available.
Q: What if my existing vent is flexible foil duct? A: Replace long runs of flexible foil with rigid metal. Keep a short, smooth transition connector only at the dryer if needed. Rigid metal reduces lint buildup and improves airflow, making it the safest option for most homes.
Q: Do I need a special hood? A: Use a hood with a damper that opens fully under airflow and closes when the dryer is off. Avoid very fine mesh screens that clog with lint. Choose a termination designed specifically for dryer exhaust to balance pest control with performance.
Q: How do I know if my run is too long? A: Check your dryer’s manual for maximum equivalent length and count each elbow as additional feet. If you are near or beyond the limit, consider rerouting, enlarging radius elbows, or consulting a pro for alternatives.
Q: Is foil tape really necessary on every joint? A: Yes. Proper foil HVAC tape seals minor gaps, boosts airflow, and keeps moist air from leaking into wall cavities. It is a small step that pays big dividends in performance and safety.
Q: Can I vent the dryer into the garage just for winter heat? A: No. Dryer exhaust contains moisture and lint that can create hazards and promote mold. Always vent to the outdoors.
Q: What signs suggest I should recheck my installation? A: Long dry times, a hot laundry room, or a musty smell point to restricted airflow. Also look for a damper that barely opens, visible lint around the hood, or a tripped thermal fuse on the dryer.
Make the Final Step Toward Safer Laundry in Elizabeth
You now have a clear, beginner-friendly path to a safe, durable dryer vent installation tailored to Elizabeth, NJ homes. If you would rather have the work done quickly with tested materials and documented airflow results, schedule professional dryer vent installation so your dryer runs efficiently through every season. Whether you DIY or hire, keep the run short, the joints sealed, and the hood accessible, and enjoy faster, safer drying for years to come.
