Introduction: Diagnose and Fix Dryer Vent Problems in Elizabeth
Even a carefully installed dryer vent can develop issues over time. Lint accumulation, crushed connectors, stuck dampers, and long or complex routes can slow drying and raise safety risks. This troubleshooting guide helps Elizabeth, New Jersey homeowners identify common symptoms, isolate causes, and correct problems quickly. If you discover bigger issues or prefer expert assistance, you can book local dryer vent installation or repair to get airflow back where it belongs.
We will cover slow drying, overheating, odors, noise, visible lint at the hood, and water or condensation in the duct. Each section includes likely causes, step-by-step checks, and practical fixes that respect best practices for materials and routing.
Symptom: Clothes Take Too Long to Dry
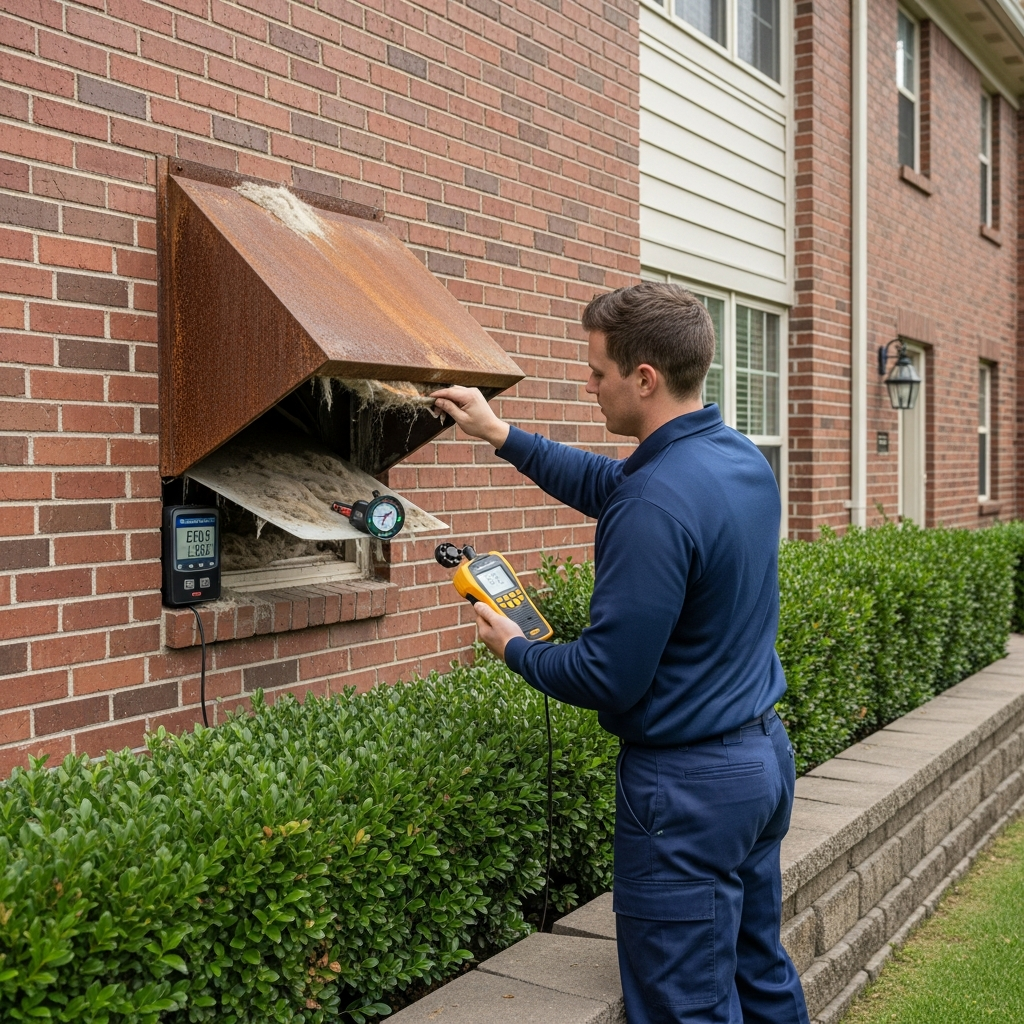
Slow drying is the most common complaint and often indicates restricted airflow. The dryer may still heat, but the moisture has nowhere to go efficiently. Start with these checks:
- Clean the lint filter thoroughly.
- Check the transition duct for kinks or crushing behind the appliance.
- Inspect the exterior hood and verify that the damper opens fully while the dryer runs.
- Look for visible lint on the cap or around the vent opening.
If these basic steps do not restore performance, disconnect the transition duct and feel the dryer’s exhaust directly. Strong airflow from the dryer but weak airflow at the termination suggests a blockage in the vent run itself.
Symptom: Laundry Room Feels Hot or Humid
Excess heat or humidity around the dryer signals poor exhaust. Beyond cleaning the filter and verifying the damper, look for disconnected joints that may be blowing warm air into wall cavities or the surrounding space. Sealing mechanical joints with foil tape and supporting the run with metal straps can resolve many of these issues.
Symptom: Burning or Musty Odors
A hot or burning smell can indicate lint near a heat source or a severely restricted vent that forces the dryer to overheat. A musty odor often means retained moisture and slow drying. In both cases, stop using the dryer until you inspect the vent path, remove blockages, and confirm the damper operates freely.
Symptom: Exterior Damper Barely Opens
If the damper moves only slightly or not at all, there may be heavy lint accumulation, a sticking pivot, or excessive resistance due to long runs or tight elbows. Clean the hood and the first few feet of duct, then observe the damper again. If movement remains minimal, consider whether the overall route is too restrictive and whether elbows can be reduced.
Symptom: Water or Condensation in the Duct
Water inside the vent suggests condensation or weather intrusion. In winter, uninsulated metal duct in unconditioned spaces can collect moisture on cold surfaces. Insulating those sections and improving seals at penetrations help. If water appears near a roof termination after storms, evaluate flashing and the cap design to ensure proper shedding of rain.
Symptom: Rattling, Vibrations, or Thumping
Noise often points to poor support or misaligned joints. Add metal straps at regular intervals to prevent sagging. Verify that the dryer is level and that the transition duct is not contacting sharp edges. Long, unsupported spans can be especially noisy during startup and cooldown as metal expands and contracts.
Root Causes: What Usually Goes Wrong
- Improper materials: Thin plastic or unlisted flex duct sags and catches lint.
- Excess elbows: Each bend adds resistance and encourages deposits.
- Crushed connectors: Pushing the dryer back too far kinks the transition duct.
- Screened terminations: Screens trap lint and block exhaust.
- Loose joints: Air leaks reduce exit velocity and can spread lint indoors.
Quick Diagnostic Procedure
- Visual survey: Check the transition duct, joints, and termination for obvious damage or lint.
- Damper test: Run the dryer on air-only and observe. The damper should open widely and smoothly.
- Airflow comparison: Feel exhaust at the dryer outlet (with the transition removed) versus at the exterior. Big differences imply an obstruction in the run.
- Sectional cleaning: Brush and vacuum the duct, starting with the most accessible sections.
- Re-test and refine: After each correction, recheck drying performance to confirm improvement.
Restoring Performance: Step-by-Step Fixes
- Replace inadequate materials: Install rigid metal duct for the main run and a short, listed transition.
- Simplify routing: Remove unnecessary elbows and shorten the run where possible.
- Support the duct: Use metal straps every few feet to prevent sags and vibration.
- Seal accessible joints: Use quality foil tape at mechanical seams; avoid screws protruding into the airflow.
- Upgrade the termination: Use a dryer-rated hood with a reliable backdraft damper and no screen.
Roof Versus Wall: Troubleshooting Differences
Roof caps are harder to access and more vulnerable to weather and debris. Watch for sticking dampers due to corrosion or ice, and verify flashing remains watertight. Wall terminations allow easier cleaning and observation but can be affected by landscaping or snow drifts. Keep the area around the hood clear and at an appropriate height above grade.
Elizabeth, New Jersey Nuances
Older homes may have thick masonry or multiple finishes to penetrate, which complicates repairs. Townhomes and multifamily structures often include long, elbow-heavy routes that demand careful cleaning and verification. Seasonal humidity can mask problems in summer by making drying feel slightly slower even with an adequate vent; use damper movement and lint accumulation as objective indicators.
Preventive Maintenance After the Fix
- Clean the lint screen before every load.
- Inspect the exterior hood monthly for free damper movement.
- Re-check the transition duct seasonally, especially after moving the dryer.
- Schedule annual deep cleaning or sooner if drying times creep upward.
When a Reinstallation Is the Best Solution
If your vent path is excessively long, includes multiple tight elbows, or uses poor materials, incremental fixes may not deliver the airflow you need. In those cases, a partial or full reinstallation pays for itself in safety, performance, and reduced wear on the dryer. Consider a new route that shortens the run, increases diameter uniformity, and uses the fewest bends possible. For a smooth upgrade, many homeowners opt for professional dryer vent installation to ensure the new system is cleanly executed and properly tested.
Frequently Asked Questions
Q: Why does my new dryer still take a long time to dry?
A: Even new appliances struggle against poor venting. Check the vent for length, number of elbows, and blockages. Ensure the exterior hood damper opens fully under operation.
Q: Can I add a screen to keep pests out?
A: Avoid screens because they collect lint. Use a dryer-rated hood with a backdraft damper that closes when not in use.
Q: What if my vent runs up to the roof?
A: Roof terminations can work but need proper caps and flashing. They are harder to inspect, so plan for safe access and more frequent checks.
Q: Is the foil tape the same as standard duct tape?
A: No. Use high-quality foil tape rated for dryer exhaust. Cloth-backed tapes can degrade and fail under heat.
Q: How do I know if the transition duct is crushed?
A: Pull the dryer forward a few inches and visually inspect. If the duct is flattened, kinked, or sharply bent, replace it and leave adequate clearance when pushing the dryer back.
Q: Do electric dryers need outdoor venting?
A: Yes. Both electric and gas dryers should vent outdoors to remove heat, moisture, and lint effectively.
Confident, Quiet Operation Is Within Reach
Most vent problems stem from a few predictable causes and respond to careful cleaning, simplified routing, and the right materials. By observing the damper, managing lint, and supporting the ductwork properly, you can restore fast, even drying and peace of mind.
Get Your Dryer Back on Track
If your laundry routine is slowed by stubborn vent issues, schedule experienced local help to correct the route, replace materials, and verify performance. Book a thorough evaluation and streamlined fix by arranging your dryer vent installation with a trusted Elizabeth, New Jersey team.
