Elizabeth, New Jersey homes experience everything from humid summers to chilly winters, and your HVAC system works hard through each season. A precise, well-documented cleaning process helps your ducts move air efficiently, reduce dust, and support consistent comfort. This guide walks step by step through what a thorough professional service should include, how homeowners can prepare, and what results to expect. If your system hasn’t been inspected in a while, consider scheduling professional air duct cleaning to reset airflow and cleanliness.
Step 1: Pre-Inspection and Planning
Technicians begin with a walkthrough to understand your home’s layout, note any recent renovations, and identify problem rooms. They may remove a few registers to inspect visible sections and take photos of the blower compartment, coil housing, and trunk lines. In Elizabeth’s older homes, they look for tight elbow joints and transitions where debris accumulates, as well as any flexible duct that requires gentle handling.
Step 2: System Safety and Protection
Before work begins, floors and furnishings are protected. The thermostat is set to off, and power to the air handler may be switched off for safety. Registers are covered or sealed as appropriate to control airflow during cleaning, and protective barriers are placed at access points to prevent dust from escaping into living spaces.
Step 3: Establishing Negative Pressure
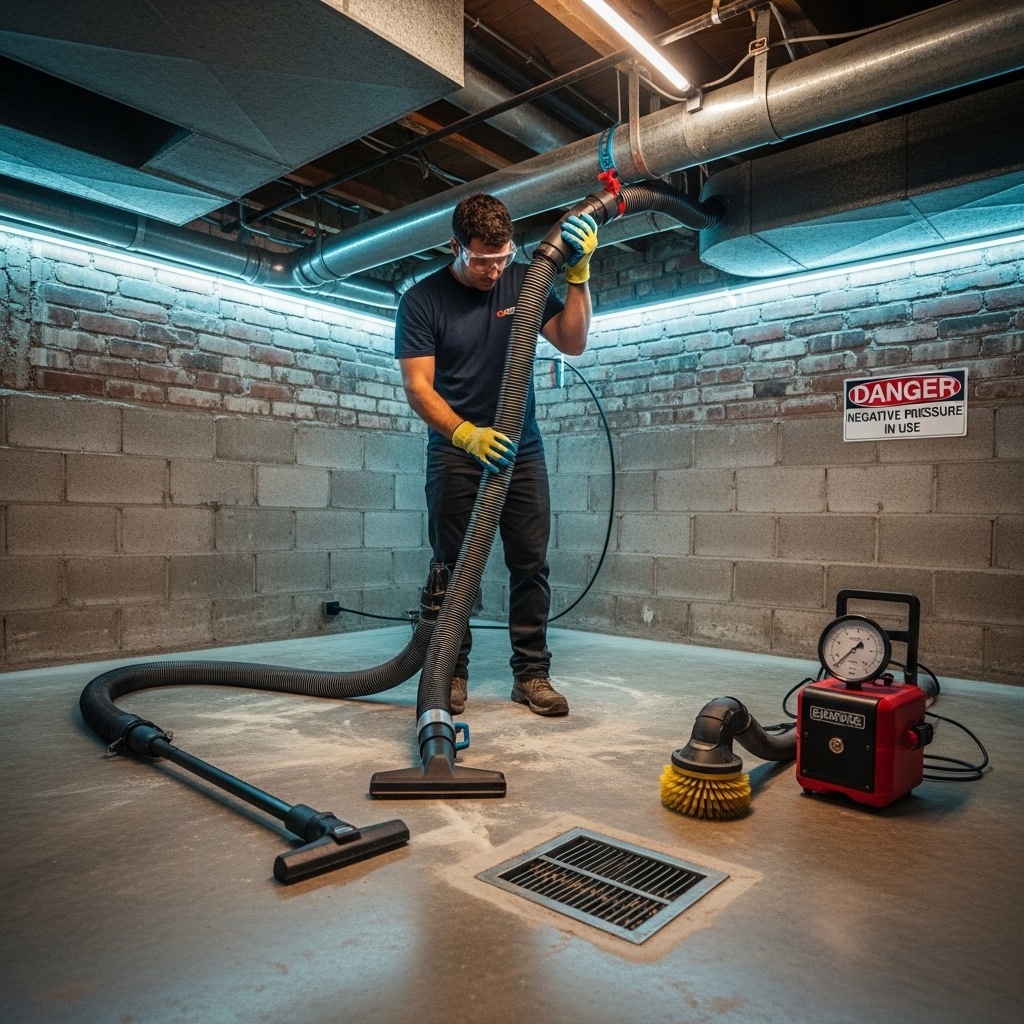
A negative-air machine or powerful vacuum is connected to the main trunk. By placing the system under negative pressure, debris is pulled toward the collection device rather than escaping into the home. Proper sealing at the connection and around registers is crucial to the success of this step.
Step 4: Agitation Tools and Techniques
Using rotary brushes, air whips, or compressed-air nozzles, the technician dislodges debris from duct walls. Tool selection depends on duct material—gentler techniques for flex and more robust methods for metal. Thorough agitation ensures that dust, lint, and heavier debris reach the vacuum stream instead of remaining stuck to corners and seams.
Step 5: Return Ducts and Supply Runs
Returns often gather the most material, especially in basements and hallways. They are addressed first or early in the process to prevent cross-contamination. Supply runs are then cleaned methodically, branch by branch, with dampers opened fully to allow tools to pass and air to flow.
Step 6: Trunk Lines and Plenums
Main trunks and plenums are critical for airflow. Cleaning these sections removes heavy buildup that can restrict movement of air to and from rooms. Care is taken to avoid damaging duct board or mastic, and any existing access panels are used or new ones created and sealed professionally.
Step 7: Blower Compartment and Coils (When Accessible)
Because airflow depends on clean mechanical components, technicians may clean the blower wheel, housing, and accessible parts of the evaporator coil housing. Removing dust from these areas can significantly improve system performance, especially after years of neglected filter changes or renovations.
Step 8: HEPA Filtration and Containment
All dislodged particles are captured through HEPA filtration. Proper containment and sealing keep debris from resettling in your home. Windows are not required to be opened; the process is controlled and closed-loop when done correctly.
Step 9: Sanitization and Odor Management (If Appropriate)
When odors, moisture issues, or microbial concerns are present, a technician may recommend additional steps in compliance with best practices. The primary focus remains physical removal of contaminants and moisture control to prevent recurrence.
Step 10: Final Checks and System Restart
After cleaning, registers are uncovered, access points are sealed, and the system is restarted. Technicians verify airflow, listen for unusual sounds, and confirm that the thermostat controls function properly. Photos or a brief report may be provided to document results.
Homeowner Preparation Checklist
- Clear a path to the air handler, trunk lines, and key registers.
- Note rooms with odors, dust, or hot/cold spots to prioritize.
- Secure pets and plan for normal project noise.
- Have a new filter ready for installation after service.
- Discuss any recent renovations, pest issues, or water incidents.
Special Considerations for Elizabeth Homes
Basements commonly house returns and equipment; lint and general storage dust can load returns quickly. In multifamily buildings or row houses, technicians plan for space constraints and shared walls. In historic properties, many homeowners value minimal alterations; professionals use existing access panels when possible and seal new ones carefully to preserve aesthetics and performance.
Quality Indicators You Can Look For
- Clear explanation of tools and sequence of steps.
- Use of negative pressure and HEPA filtration throughout.
- Careful handling of flex duct and duct board.
- Attention to blower and coil areas when appropriate.
- Before-and-after photos or a concise service summary.
What Results to Expect
Post-cleaning, many homeowners report less dust settling on surfaces and more even temperatures. Airflow often improves, and filters may last closer to their rated change interval. While cleaning cannot fix undersized ducts or poor original design, it can restore lost performance and remove debris that compromises comfort.
How Often Should You Repeat the Process?
For most households, inspections every 1–2 years and cleaning as needed are sufficient. Renovations, pets, smoking indoors, or water issues may increase frequency. If you live near a busy roadway or industrial corridor, ask your technician for a schedule tailored to your environment.
Integrating Cleaning with Routine HVAC Care
Combine duct cleaning with seasonal HVAC checkups, filter replacements, and coil maintenance. A holistic plan helps keep static pressure in the right range, supports the blower motor, and preserves overall efficiency. If you manage humidity with a dehumidifier in summer, keep its filter clean and drains clear to avoid adding moisture to the system.
Mid-Project Communication
A good provider will keep you informed, especially if they discover damaged insulation, disconnected branches, or signs of pest activity. You should understand any recommended repairs and how they relate to comfort, efficiency, and cleanliness. And remember, many Elizabeth households pair periodic tune-ups with professional air duct cleaning to maintain consistent performance year-round.
Aftercare Tips
- Replace or upgrade your filter to an appropriate MERV rating for your system.
- Keep registers clear of rugs and furniture to promote airflow.
- Use exhaust fans when cooking and showering to reduce moisture and particles.
- Vacuum return grilles periodically to minimize surface dust.
- Document service dates and results for future reference.
FAQs: Air Duct Cleaning Process
Q: How long does cleaning take? A: Most single-family homes require several hours, depending on duct complexity and accessibility.
Q: Will it be messy? A: Proper containment and HEPA filtration keep debris contained. Professionals protect floors and furnishings.
Q: Do I need to leave the house? A: Not typically, though pets should be secured due to noise and open access points.
Q: Can cleaning fix airflow imbalances? A: It can help by removing obstructions. However, design limitations or leaks may need additional solutions.
Q: Should I clean after renovations? A: Yes. Drywall dust and construction debris can load returns and settle in branches.
Q: Are chemicals necessary? A: Physical removal and moisture control are primary. Additional treatments are case-specific.
Make Your Next Service Count
If your home has uneven temperatures, dusty surfaces, or lingering odors, it may be time for a systematic reset. Prepare your space, choose a provider that follows best practices, and keep up with routine HVAC maintenance. For professional support tailored to Elizabeth homes, schedule trusted air duct cleaning and enjoy clearer airflow and comfort across the seasons.

