Dryer Vent Cleaning Steps for Elizabeth New Jersey Homeowners
A clear exhaust path is essential for safe, efficient laundry. In Elizabeth New Jersey—where homes range from older multi-family buildings to newer townhouses—vent routing can be complex, with multiple elbows and long runs that demand careful attention. This guide outlines practical steps homeowners can take to understand their system, recognize warning signs, and support safer operation. Early in your journey, remember that professional dryer vent cleaning is a cornerstone of maintenance, complementing your everyday habits with deep, system-wide results.
Whether you are a first-time homeowner or have cared for your property for years, knowing what to look for around your dryer can prevent disruptions, reduce humidity in your laundry area, and help your appliance last longer. The following steps emphasize observation, basic upkeep, and informed decisions about when to bring in an expert.
Step 1: Know Your Vent Path
Begin by identifying where your dryer exhausts. Does the vent exit through a side wall or travel up to the roof? How many elbows are along the way? Is the termination hood accessible, and does its flap move freely during operation? In older Elizabeth New Jersey homes, renovations may have rerouted vents in ways that add resistance, making a clear mental map especially valuable.
If you have a stacked unit or a tight laundry closet, take care when moving the dryer to look behind it. The flexible transition duct should be as short as practicable, free of kinks, and made of a material that resists crushing. Excess length can create loops that trap lint and slow airflow.
Step 2: Practice Smart Daily Habits
Clean the lint screen before every load, and periodically wash it with mild soap and water to remove fabric softener residue that can impede airflow. Avoid overloading the drum; proper tumbling shortens cycles and reduces internal moisture, which helps keep the vent drier and less prone to sticky lint buildup. Keep the area behind the dryer uncluttered so stored items don’t crush the transition duct.
Step 3: Watch for Performance Changes
Track how long a normal load takes to dry. If a familiar load begins requiring extra time, do not ignore the change. Other cues include a laundry room that feels warmer or more humid during cycles, a dryer cabinet that seems unusually hot, or a musty or burnt-dust odor. Outside, inspect the termination hood while the dryer runs; a weakly opening flap suggests rising back-pressure in the duct.
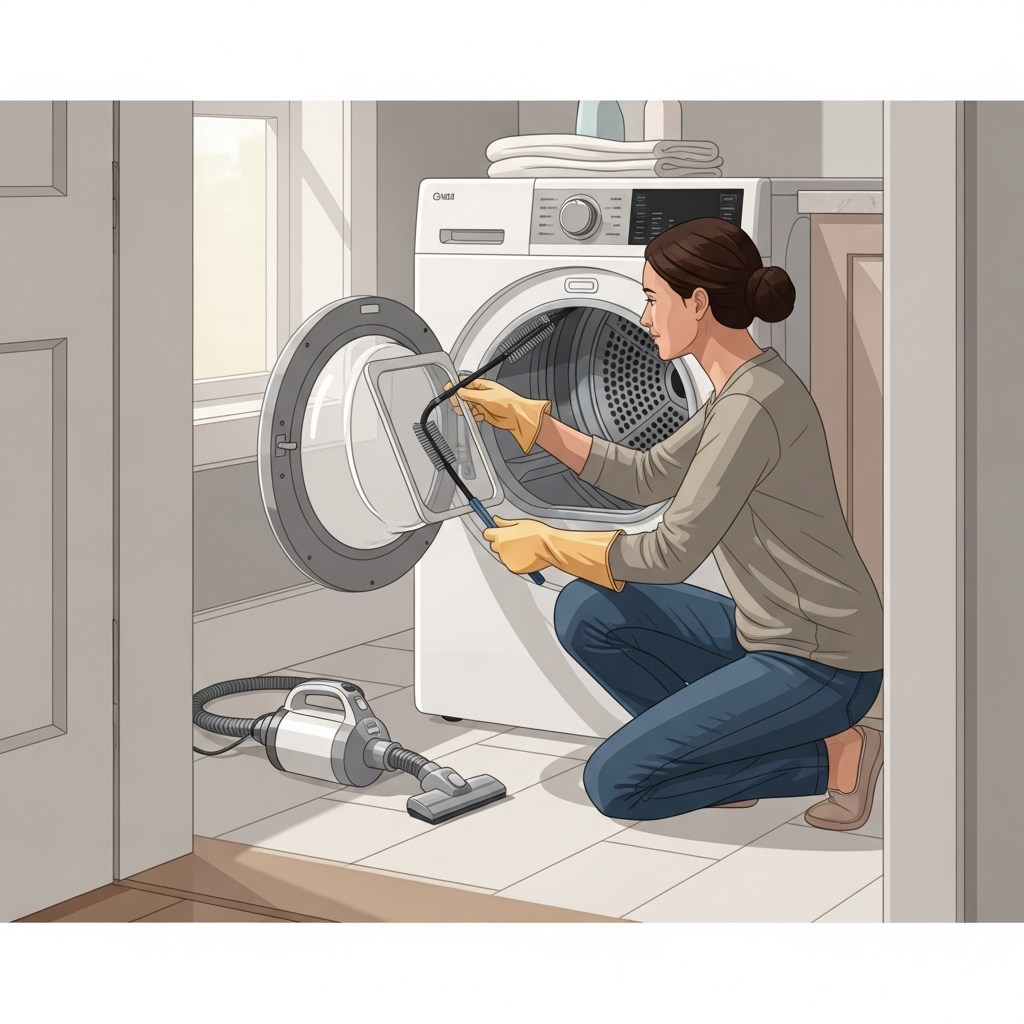
Step 4: Basic Homeowner Maintenance
Some homeowners with short, straight vents can use a brush kit to dislodge lint from accessible sections. If you try this, take precautions: unplug the dryer (and close the gas valve if applicable), move the machine carefully to avoid damaging lines, and work methodically. Use consistent rotation so the brush head does not detach. Vacuum lint that falls behind the dryer and at the wall or floor connection. Always re-check the transition duct for kinks when you push the dryer back into place.
However, recognize limits. Brush kits struggle in ducts with multiple tight elbows, long runs, concealed joints, or roof terminations. Aggressive brushing on thin, aged duct walls can cause punctures, leading to leaks into wall cavities. If you meet resistance, stop and consult a professional.
Step 5: Understand the Difference a Pro Makes
Professionals clean from strategic access points, use agitation tools matched to duct material and geometry, and employ capture systems so lint does not circulate indoors. They also assess the transition duct’s material and length, the integrity of joints, and the termination condition. The result is not only a cleaner duct, but a system that is verified to exhaust properly. In Elizabeth New Jersey properties with complex vent routes, the difference is especially noticeable in shorter dry times and a cooler laundry room.
Step 6: Plan Inspection Frequency
Your household size, fabric types, and pet hair levels all influence how quickly lint accumulates. Towels, cottons, and fleece generate more lint than synthetics. A busy family with pets may need more frequent inspections than a single-occupancy home. Seasonal shifts matter too—winter can encourage condensation inside metal ducts in unconditioned spaces, forming clumped lint that resists casual brushing.
Step 7: Check Termination and Outdoor Clues
Examine the termination hood periodically. The flap should swing easily when the dryer runs and close when idle. Avoid screens that cover the opening; although they may deter pests, they trap lint and can quickly create hazardous blockages. If you notice lint staining on siding near the hood or debris collecting at the outlet, airflow is likely compromised and needs attention.
Step 8: Decide When to Call a Professional
Persistent slow dry times, repeated safety shutoffs, or a dryer cabinet that runs hot indicate deeper issues. If your vent travels through multiple floors, has several elbows, or terminates on the roof, a DIY brush usually won’t reach far enough. Professionals can also spot noncompliant materials and recommend safer alternatives that maintain better airflow over time. In multi-family buildings, professional cleaning helps coordinate access and ensure that neighboring units’ vents aren’t inadvertently affected.
Safety Considerations During Any Work
Always disconnect power before moving the dryer. For gas dryers, close the gas valve and check for leaks when reconnecting. Use care on ladders when inspecting exterior terminations. Avoid using flammable solvents or excessive water near the dryer’s electrical components. If you are unsure about any step, pause and consult an expert rather than risk damage or injury.
Benefits You Can Expect After a Thorough Cleaning
Clearer vents typically deliver shorter dry times, fresher-smelling laundry, steadier temperatures, and a cooler laundry room. You may also notice less lint settling on shelves and floors, since improved capture at the lint screen and efficient exhaust limit stray fibers. Over time, these benefits support the dryer’s longevity by reducing heat stress and mechanical strain.
Frequently Asked Questions
Q: Do new dryers still need vent maintenance? A: Yes. Even advanced models rely on unobstructed ducts to perform as designed. Sensors cannot overcome blocked airflow.
Q: How can I tell if my transition duct needs replacement? A: If it is thin, easily crushed foil or is longer than necessary with loops and kinks, consider upgrading to a safer, smoother option and shortening it to minimize resistance.
Q: Is it okay to install a screen over the exterior outlet to stop pests? A: Avoid screens that trap lint. Use proper termination designs that discourage entry without impeding exhaust.
Q: Can I rely on a shop vacuum to clean the vent? A: Vacuums help capture dislodged lint but rarely reach far enough or agitate stubborn deposits. They are best used as part of a comprehensive process.
Q: Why does my laundry smell musty after drying? A: Restricted airflow leaves residual moisture that fosters odors. Restoring exhaust typically clears the issue.
Q: How long should a normal load take to dry after cleaning? A: That depends on fabrics and load size, but you should notice a return to familiar, shorter cycle times when airflow is restored.
Q: What if my vent terminates on the roof? A: Roof terminations are common in multi-level homes. They often require specialized access and tools, which is why professional service is recommended.
Bring It All Together
Effective maintenance blends smart habits with strategic professional help. By mapping your vent path, monitoring performance, and scheduling deeper service when needed, you safeguard your home and restore the quick, reliable drying your household depends on.
Make Laundry Smoother and Safer in Elizabeth
If your dryer runs longer than it used to or your laundry room feels warmer than normal, it’s time to act. Book professional dryer vent cleaning and give your Elizabeth New Jersey home the reliable airflow it needs.
