Leaky ducts can quietly erode comfort, raise energy usage, and pull dust or musty odors into your living spaces. In Elizabeth, New Jersey—where seasonal swings challenge both heating and cooling—sealing leaks is one of the most impactful improvements you can make for a healthier, more consistent home. Whether you plan to handle minor fixes yourself or coordinate with a professional, the guidance below will help you diagnose problems, choose suitable materials, and verify real results. If you are seeking hands-on support with a thorough assessment, consider contacting a local specialist experienced in air duct repair who can pair expert diagnostics with durable, code-compliant sealing.
How Duct Leaks Affect Comfort and Indoor Air Quality
Leakage diminishes the amount of conditioned air reaching your rooms, and return leaks can pull contaminants from attics, basements, or wall cavities. The result is uneven temperatures, more frequent cycles, and dust that seems to reappear quickly. In older Elizabeth homes, mixed materials and add-on renovations can create hidden leak points at transitions and legacy seams. Even newer systems can suffer from loose collars, dried tape, or insufficient support that leads to sagging and gaps.
By tightening up the duct network and restoring proper sealing, you improve delivery to each register and reduce bypass paths. This stabilizes room-to-room temperatures and helps your HVAC system do its job more efficiently during summer heat waves and winter cold snaps.
Finding Leaks: Practical Diagnostics for Homeowners
- Visual scan: Look for loose or missing tape at joints, gaps around boots, and insulation that has pulled away from the duct surface.
- Hand test: With the system running, feel around seams for moving air, especially near the air handler, takeoffs, and returns.
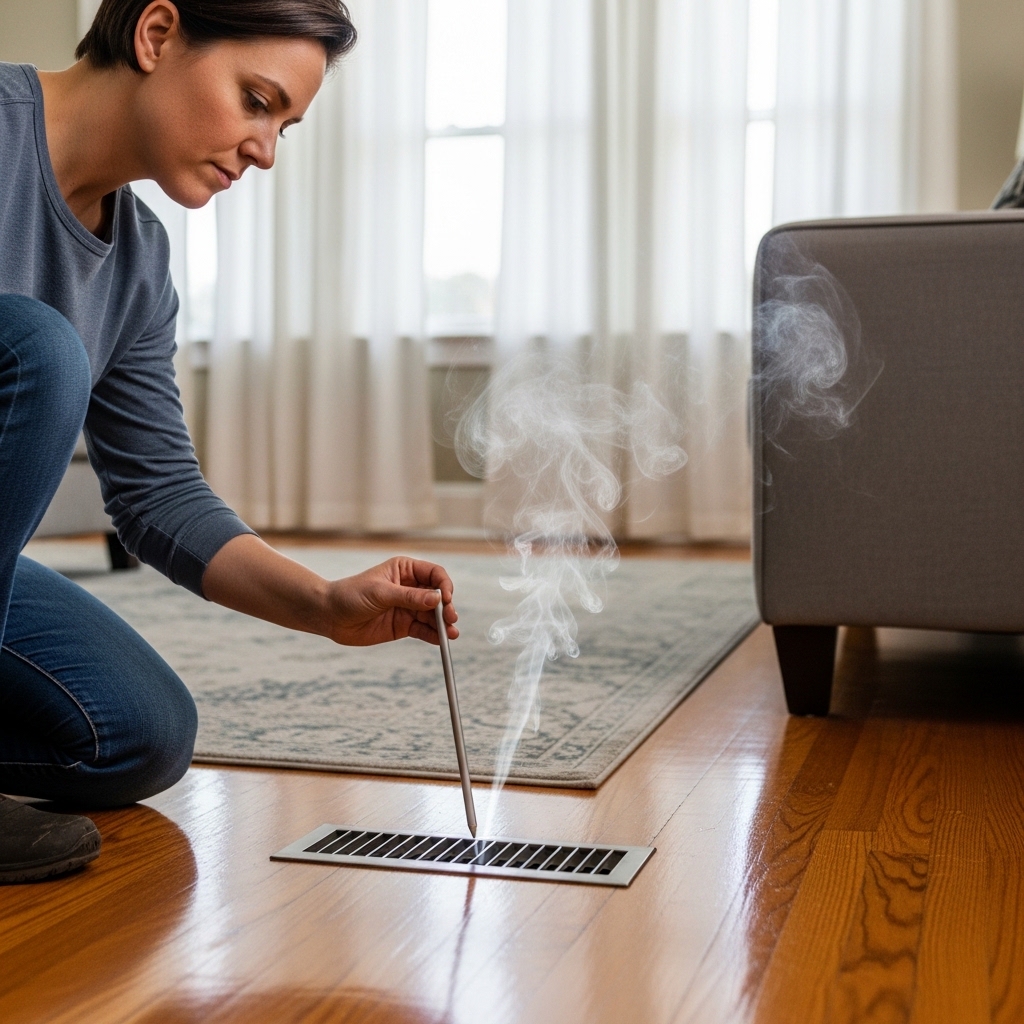
- Smoke tracing: A smoke pencil or incense stick can reveal air movement at suspected leaks. Move slowly along seams and collars.
- Dust patterns: Dark streaks on insulation or around joints often mark areas where air leaks into or out of the duct.
- Condensation clues: In summer, moisture on metal ducts may indicate insulation or vapor barrier issues, which can accompany leaks.
Choosing the Right Materials
For most rigid metal ducts, mastic is the go-to sealant. Apply it generously over cleaned seams and mesh-reinforce larger gaps. UL 181 foil tape—distinct from ordinary cloth duct tape—can supplement mastic at specific joints. For flexible duct connections, ensure the inner liner is properly clamped to the collar and sealed with mastic, then the outer jacket is secured and taped. When sections are crushed or excessively kinked, replacement is often the better path to restore full airflow.
In unconditioned spaces, confirm that insulation remains continuous after sealing. Sealing without addressing insulation can leave you with persistent condensation risks and temperature losses. Pairing these improvements makes the work more durable.
Safety and Access Considerations
Before working in attics or crawlspaces, wear protective gear and ensure safe footing. Turn off power to the air handler when working inside or near the unit. Keep flammable materials away from heat-producing components and maintain required clearances. In basements and attics, watch for protruding nails, low headroom, and unstable surfaces.
If a section is difficult to reach or located near sensitive components, it is reasonable to call in a professional. Access planning can be as important as sealing itself, especially in older Elizabeth homes where ducts weave through tight framing.
Step-by-Step Sealing Workflow
- Document symptoms: Note which rooms are uncomfortable and when. This guides your focus.
- Inspect returns first: Return leaks can degrade air quality and system performance quickly.
- Clean surfaces: Wipe dust from seams before applying mastic or tape for better adhesion.
- Mechanically secure: Use screws or clamps where appropriate before sealing over joints.
- Seal, then insulate: Close air pathways first; then restore insulation and vapor barriers.
- Test as you go: Recheck with your hand or smoke pencil to confirm improvements.
- Balance final airflow: Slight damper adjustments can refine comfort once leaks are closed.
Elizabeth Climate and Construction Nuances
Elizabeth’s proximity to the coast brings humidity that magnifies the impact of insulation and vapor barriers. In summer, attics can get hot enough to create substantial temperature differences across duct walls, making continuous insulation critical. In winter, basements can be cool and damp, so sealing and insulating returns helps control condensation and odors.
Older homes may feature partial upgrades where metal trunks feed newer flex runs. Pay attention to transitions and takeoffs—these are common leak points. In some historic properties, return pathways are limited; improving transfer grills or adding returns can make a noticeable difference.
When Replacement Beats Repair
If a flexible run is crushed, the inner liner torn, or metal sections are rusted through, sealing alone will not resolve the problem. Replacing compromised segments restores cross-sectional area and smoother airflow. Where multiple bends and tight turns restrict flow, a re-route can outperform any patching effort. Pair these replacements with thorough sealing at neighboring joints to prevent future weak links.
Verification: How to Know Your Efforts Worked
After sealing, look for more even temperatures and steadier system cycles. Registers should feel more robust. If you have access to tools, use a simple vane anemometer to compare airflow before and after. Alternatively, a professional can perform duct pressurization to quantify leakage reduction and measure room-to-room delivery, offering a clear picture of performance gains.
Working With a Professional Partner
Even if you tackle minor sealing yourself, a professional inspection can uncover hidden return leaks or mis-sized runs that limit improvements. Clear communication about your goals, time frame, and accessibility constraints helps your contractor plan efficiently. Photos of problem areas you cannot reach are useful; so are notes about when and where comfort issues are most noticeable.
In many cases, a combined approach—homeowner sealing of obvious joints plus professional diagnostics and targeted repairs—delivers excellent results. If the initial inspection reveals systemic issues, engage a team skilled in professional air duct repair to design a comprehensive plan that includes verification testing and final balancing.
Maintenance Habits That Protect Your Work
- Filter discipline: Use the right size and replace on schedule; an ill-fitting filter undermines return integrity.
- Clear returns: Do not block return grilles with furniture or drapes; airflow needs a clear path.
- Annual checkups: A quick inspection of visible joints and supports helps catch small issues early.
- Household changes: If you finish a basement or convert an attic, reassess duct performance to suit new loads.
- Moisture control: Address basement dampness and attic ventilation to protect insulation and seals.
Frequently Asked Questions
Q: Can I use ordinary cloth duct tape? A: No. Cloth tape dries and fails over time. Use UL 181 foil tape and mastic for durable seals.
Q: Where do leaks cause the most trouble? A: Returns near the air handler and transitions are common culprits. These leaks can draw in dust and unconditioned air, reducing system performance.
Q: How long does sealing take? A: It depends on access and system complexity. Even a few hours of targeted work can address critical joints, while comprehensive sealing may require more time.
Q: Will sealing help with dust? A: Yes, especially if return leaks are closed and filters fit properly. You should notice less settling dust over time.
Q: Do I need special tools? A: Basic hand tools, a screwdriver, clamps for flex connections, and a smoke pencil are helpful. For performance testing, a professional’s instruments provide deeper insights.
Q: Is insulation as important as sealing? A: In unconditioned spaces, both matter. Sealing eliminates air paths; insulation reduces heat transfer and condensation risks.
Q: What about balancing dampers? A: After sealing, slight adjustments can fine-tune comfort. Do not fully close any damper; aim for incremental changes and retest.
Q: How often should I recheck my ducts? A: Inspect annually and after major weather events or renovations that might disturb ducts or insulation.
Ready for Reliable Comfort in Every Room
If you are tired of uneven temperatures, dusty air, or a system that runs longer than it should, start with targeted diagnostics and sealing. Strengthening your duct network can bring immediate, tangible improvements. For a thorough plan tailored to Elizabeth homes—from inspection to verification—connect with a trusted local team and schedule air duct repair to restore consistent comfort throughout your home.
