In a commercial kitchen, ventilation is as fundamental as refrigeration or fire suppression. Strong, reliable airflow keeps heat and smoke at bay, reduces odors, and protects against grease fires. In Elizabeth, New Jersey—where restaurants range from high-volume quick service to specialty concepts—commercial kitchen exhaust hood cleaning is a cornerstone of safe operations. This guide explains how comprehensive service works, what you can expect from trained technicians, and how to prepare your team and space for a smooth, effective visit. For operators who want a streamlined plan, partnering with professionals for scheduled kitchen exhaust hood cleaning ensures that critical components beyond staff reach are maintained to standard.
Why commercial cleaning matters
Grease is persistent. Even with daily filter care, aerosols deposit on hood interiors, ducts, and the fan housing. Over time, this buildup restricts airflow, strains motors, and increases fire risk. Professional cleaning aims to remove grease to bare metal where required, restoring the system to its design performance. The result is a cooler line, better capture of smoke and steam, and improved comfort for staff and guests. Just as importantly, documentation from professional service supports compliance during inspections and audits.
Components addressed during service
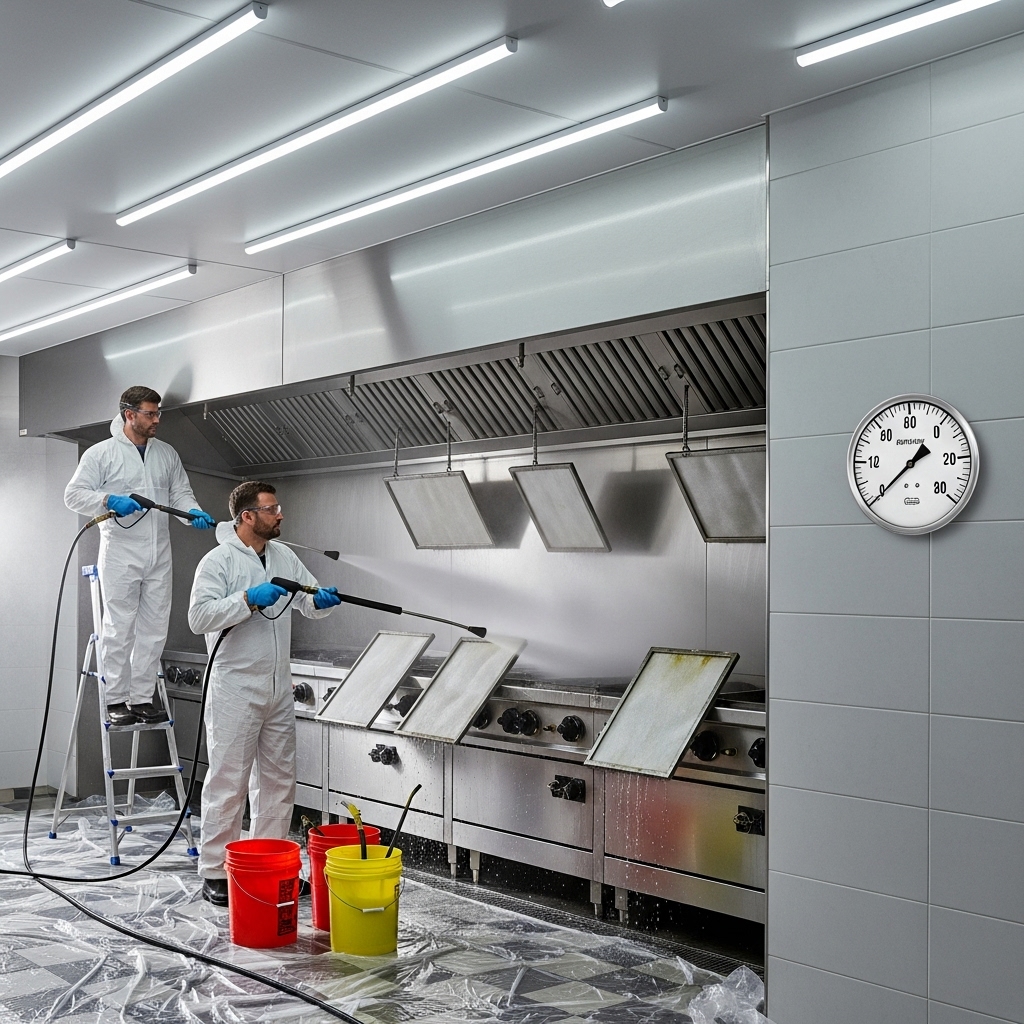
- Hood canopies and plenums: cleaned to remove film and hardened deposits
- Baffle filters: degreased, rinsed, dried, and reinstalled or swapped
- Ductwork: accessed via panels or installed access points and cleaned internally
- Exhaust fan: bowl, blades, and housing cleaned; belts and pulleys inspected
- Rooftop containment: media replaced if saturated; surfaces protected and wiped
How professionals clean safely and thoroughly
Technicians survey the site, protect equipment and floors, and set up containment to keep water and degreaser where it belongs. They open access panels and work from the fan downward, using hot-water pressure and targeted chemistry to break down grease. Photos document the condition before and after. At the conclusion, they test the system, verify smooth fan operation, and leave a service tag with the date and scope performed. A written report with photos supports your records and helps prioritize repairs if needed.
Preparing your kitchen for service
- Choose a time with minimal production, often after close or during a dark day.
- Remove or cover food and utensils near the hood and cookline.
- Pull portable equipment away from walls to provide access.
- Inform staff about temporary fan shutdowns and the expected duration.
- Ensure roof access is clear and safe; unlock doors and gates in advance.
What to expect during the visit
Once protection is in place, the team disassembles filters and access panels, inspects for defects, and begins degreasing. Expect some noise from pressure equipment and the scent of degreaser, which should dissipate upon completion and restart of the fan. The crew replaces saturated rooftop media, checks the hinge kit for safe fan tilt, and verifies that electrical connections and flex conduits are not strained. Before they leave, they will wipe touch points, mop, and confirm that switches and interlocks are restored to normal operation.
Signs your system needs service
- Lingering smoke at the hood edge during a normal rush
- Grease streaks near access panels or seams
- Filters loading unusually fast despite proper in-house cleaning
- Fan vibration, belt squeal, or slow startup
- Odors returning soon after daily cleaning
Scheduling by cooking type
High-output frying and solid fuel operations often require monthly to bimonthly duct and fan cleaning. Moderate grills and griddles trend quarterly. Low-volume or seasonal kitchens may reach semiannual or annual intervals, if inspections show minimal buildup. Your provider can measure grease thickness to fine-tune the schedule for your Elizabeth location.
Benefits beyond compliance
A clean, balanced system reduces heat at the line, which helps staff stay focused and reduces turnover. It also supports consistent product quality by stabilizing temperatures over the equipment. Fans that run smoothly draw less current and last longer, reducing unexpected downtime.
Quality assurance and reporting
Expect a clear, photo-rich report showing duct interiors, hood plenums, and fan components before and after cleaning. Look for notes on access, damaged filters, belt wear, and containment status. Use these insights to plan small repairs before they become bigger issues. Keep the service tag visible at the hood and the report in your records for inspectors.
How in-house tasks complement professional service
Staff can maximize the value of professional cleaning by maintaining daily standards: wipe the hood face, empty grease cups, and clean or rotate baffle filters. Between professional visits, managers can conduct quick checks of rooftop containment and note any fan noise. This integrated approach keeps the system at peak performance.
Mid-cycle refreshers
Some operators schedule a mid-cycle visit focusing on high-risk areas like the plenum and the first few feet of duct near the hood, where grease tends to accumulate fastest. Others add a filter soak service to support teams during peak season. Discuss these options if your kitchen sees significant volume swings throughout the year.
Environmental stewardship
Responsible providers protect roof membranes with absorbent berms, collect wash water, and dispose of waste according to best practices. Inside, they use food-safe degreasers and protect adjacent areas, leaving your space as clean as they found it. This attention to detail prevents secondary cleanups and demonstrates respect for your facility and community standards in Elizabeth.
FAQ
Q: How long does a typical commercial cleaning take? A: Most single-hood systems are serviced in several hours, depending on access and soil load. Complex systems can take longer.
Q: Will service interrupt operations? A: Cleaning is usually scheduled during off-hours. Fans may be off during the visit, but operations resume after testing and sign-off.
Q: What if my duct lacks access panels? A: A qualified provider can install grease-tight, gasketed panels to enable thorough cleaning and inspection.
Q: How do I know the work was thorough? A: Review the photo report, check the service tag, and inspect rooftop containment and fan operation afterward.
Q: Do I still need to clean filters daily? A: Yes. Professional service complements—rather than replaces—daily filter maintenance, which is critical for airflow.
Plan your next visit
If your team is battling smoke at the cookline or you are preparing for an inspection, schedule expert kitchen exhaust hood cleaning to restore airflow, reduce risk, and document compliance. With trained technicians and a thoughtful process, your Elizabeth kitchen can stay comfortable, efficient, and inspection-ready year-round.
